Vintage sewing machine manuals are crucial for preserving these mechanical marvels, offering detailed guidance on operation, repair, and understanding their unique features.
The Allure of Vintage Machines
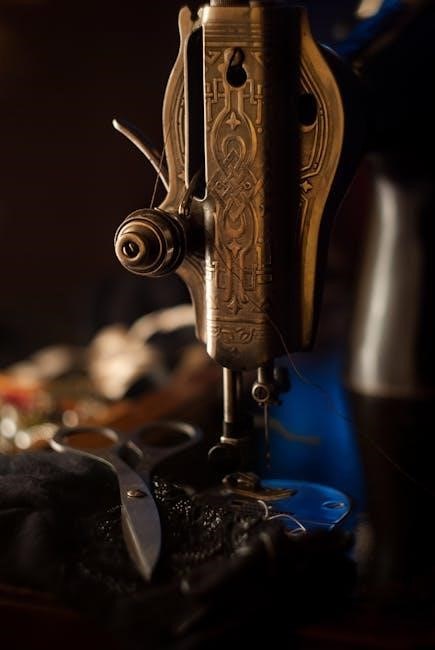
Vintage sewing machines possess a unique charm, representing an era of craftsmanship and durability often unmatched by modern counterparts. Their robust construction and timeless designs appeal to collectors and sewing enthusiasts alike. Beyond aesthetics, these machines offer a tangible connection to the past, embodying the ingenuity of early engineering.
Many appreciate the simplicity and mechanical elegance of these older models, finding them more reliable and easier to repair than computerized alternatives. The availability of original manuals enhances this appeal, allowing owners to fully understand and maintain their machines. Discovering a manual for a specific model feels like unlocking a secret, providing insights into its original functionality and intended use.
Why Manuals are Crucial for Restoration
Restoring a vintage sewing machine without its manual is a challenging endeavor. These documents provide essential details regarding disassembly, reassembly, and proper lubrication – critical steps for a successful restoration. Manuals detail specific part identification, often including diagrams, which are invaluable when sourcing replacements or understanding the machine’s internal workings.
Furthermore, they outline original performance benchmarks, allowing restorers to verify functionality after repairs. Knowing how the machine should operate, through stitch type capabilities and material handling, is vital. Access to manuals prevents guesswork and ensures the machine is returned to its original working condition, preserving its historical integrity and functionality. They truly are indispensable tools.

Locating Vintage Sewing Machine Manuals
Archive.org, online repositories, and dedicated forums are excellent resources for discovering and downloading free vintage sewing machine manuals in PDF format.
Archive.org as a Primary Resource
Archive.org stands out as a phenomenal digital library, offering a vast collection of scanned vintage sewing machine manuals freely available to enthusiasts worldwide. Users can easily search for specific brands or models, often finding complete instruction books and supplementary materials. The platform’s interface allows for convenient viewing online or downloading in PDF format for offline access.
Beyond simple manuals, Archive.org frequently hosts additional resources like sales catalogs, advertisements, and even related ephemera, providing a richer context for understanding these machines. The “favorite” feature allows users to curate personal collections of manuals for easy retrieval. Discovering a manual, like the Stradivaro Radi-O-Matic Streamliner, becomes a rewarding experience, connecting you directly to the history of sewing technology.
Other Online Repositories and Websites
While Archive.org is a cornerstone, numerous other online resources contribute to the accessibility of vintage sewing machine manuals. Dedicated websites and online communities often compile and share digitized manuals, catering to specific brands or eras. These repositories frequently emerge from the passion of collectors and restorers eager to preserve this knowledge.
Exploring these alternative sources can uncover manuals not yet available on Archive.org, expanding your research possibilities. Remember to verify the source’s reliability and the manual’s authenticity. Combining searches across multiple platforms maximizes your chances of locating the precise documentation needed for your machine. Downloading in PDF format ensures long-term preservation and convenient access.
Utilizing Online Forums and Communities
Online forums and dedicated communities represent invaluable resources for locating vintage sewing machine manuals and gaining expert advice. Members frequently share links to manuals, offer identification assistance, and discuss repair techniques. These platforms foster a collaborative environment where knowledge is freely exchanged.
Actively participating in these communities allows you to tap into a wealth of collective experience. Posting specific machine details or manual requests can quickly yield results. Furthermore, the comments sections of benchmark videos often contain links to free instruction manuals and repair tips. Remember to contribute back to the community by sharing your own findings and experiences;

Understanding Manual Contents
Vintage manuals detail operational instructions, maintenance schedules, and troubleshooting guides, providing essential insights into a machine’s features and proper upkeep.
Operational Instructions & Features
Vintage sewing machine manuals meticulously outline the correct procedures for operating each model, covering everything from threading the needle and bobbin to selecting stitch types and adjusting tension. These instructions are vital, as mechanisms differ significantly between brands and eras. Manuals detail specific features, like the capabilities of stitch types – straight stitch, zigzag, and decorative options – and how to utilize them effectively.
Understanding a machine’s ability to handle various materials, such as denim, sailcloth, or leather, is also clearly explained. Diagrams and descriptions illustrate how to adjust settings for optimal performance with different fabrics. The manuals often highlight unique features of the machine, showcasing its intended purpose and the techniques it excels at, offering a comprehensive guide to unlocking its full potential.
Maintenance Schedules & Procedures
Vintage sewing machine manuals prioritize longevity through diligent maintenance. They provide detailed schedules outlining when to oil specific parts – gears, bearings, and moving components – to ensure smooth operation and prevent wear. Procedures for cleaning lint and dust accumulation are also crucial, as buildup can impede performance. Manuals often specify the type of oil recommended, avoiding modern lubricants that could damage vintage mechanisms.
Beyond routine cleaning and oiling, manuals detail more involved procedures like belt replacement and tension adjustments. These guides emphasize preventative care, helping users identify potential issues before they escalate into major repairs. Following these schedules and procedures is essential for preserving the machine’s functionality and extending its lifespan for generations to come.
Troubleshooting Common Issues
Vintage sewing machine manuals are invaluable when facing operational difficulties. They systematically address common problems like thread breakage, skipped stitches, and uneven tension, offering step-by-step diagnostic procedures. Manuals often include detailed illustrations pinpointing potential causes – a clogged needle, incorrect threading, or worn-out parts – and corresponding solutions.
These guides empower users to self-diagnose and resolve issues, reducing reliance on professional repair services. They also cover more complex problems, such as motor malfunctions or timing discrepancies, providing guidance for basic adjustments. Importantly, manuals often caution against attempting repairs beyond one’s skill level, emphasizing safety and preventing further damage. Referencing these sections can restore functionality and preserve the machine.
Decoding Manual Terminology
Understanding vintage sewing terminology and identifying parts through diagrams within the manuals is essential for successful restoration and repair efforts.
Understanding Vintage Sewing Terminology
Navigating older sewing machine manuals often requires deciphering terminology unfamiliar to modern users. Terms like “shuttle,” “bobbin winder,” and “feed dog” held specific meanings relating to the mechanics of these machines. Recognizing these terms, as detailed in the manuals, is paramount.
Furthermore, manufacturers frequently employed unique naming conventions for parts and adjustments. A “drop feed” mechanism, for instance, might be described differently across brands. Becoming familiar with these nuances, through careful study of the manual’s glossary or descriptive text, unlocks a deeper understanding of the machine’s operation.
Successfully interpreting these terms allows for accurate troubleshooting and repair, ensuring the longevity of these vintage treasures. Ignoring these details can lead to misdiagnosis and potentially damaging interventions.
Identifying Machine Parts from Diagrams
Vintage sewing machine manuals heavily rely on detailed diagrams to illustrate component locations and assembly procedures. These exploded views are invaluable for disassembly and reassembly, especially when dealing with complex mechanisms. Learning to interpret these illustrations is a critical skill for restoration.
Often, parts are labeled with numbers or letters that correspond to a parts list within the manual. Careful cross-referencing between the diagram and the list is essential for accurate identification. Recognizing variations in part shapes and sizes, as depicted in the diagrams, prevents incorrect installation.
These visual aids are particularly helpful when encountering unfamiliar components or when physical markings on the machine have worn away over time. Mastering diagram interpretation significantly streamlines the repair process.
Repairing with Manuals: A Step-by-Step Approach
Manuals guide repair by first assessing necessity, then providing detailed disassembly/reassembly instructions, often complemented by benchmark videos demonstrating proper function.
Determining if Repair is Necessary
Before diving into disassembly, a crucial first step is accurately assessing whether your vintage sewing machine truly needs repair. Many perceived issues stem from simple misunderstandings of operation or lack of proper maintenance, details often clarified within the original manual.
Consult your machine’s manual to understand its intended performance characteristics. Referenced benchmark videos, showcasing numerous vintage models, are invaluable for comparison; observe how a functioning machine should operate, its stitch types, and its ability to handle various fabrics like denim or leather.
Carefully compare your machine’s behavior to these benchmarks. Is the deviation minor, or a significant malfunction? Often, comments sections accompanying these videos contain user-shared repair tips and links to further resources, potentially resolving the issue without extensive work.
Disassembly and Reassembly Guidance
Vintage sewing machine manuals are indispensable when undertaking disassembly. They provide detailed, step-by-step instructions, often accompanied by exploded diagrams, illustrating the correct sequence for removing components. Ignoring this guidance can lead to lost parts or incorrect reassembly, hindering functionality.
Prioritize careful observation and documentation during disassembly – photograph each stage! The manual will specify the order of operations, and noting screw locations and component orientations is vital. Reassembly should follow the reverse process, referencing the manual frequently.
Remember, these machines are often mechanically complex. Patience and a methodical approach are key. Supplement the manual with benchmark videos demonstrating similar machine repairs for visual clarity and troubleshooting assistance.
Benchmarking Performance with Video Resources
Vintage sewing machine manuals often lack dynamic demonstrations. Video resources bridge this gap, showcasing proper operation and expected performance. Observing a correctly functioning machine provides a crucial benchmark for identifying deviations in your own.
Numerous online channels feature demonstrations of over a hundred vintage models, illustrating stitch types and material capabilities – from delicate fabrics to robust denim and leather. These videos aren’t just for show; comments sections frequently contain repair tips and links to free manuals!

Compare your machine’s performance to these benchmarks. Does it produce similar stitches? Can it handle comparable materials? Discrepancies signal potential issues requiring further investigation, guided by your manual.

Preserving and Utilizing Manuals
Downloading manuals as PDFs offers digital convenience, while printing provides a practical, physical resource for hands-on restoration and ongoing machine maintenance.
Downloading and Printing PDF Formats
The accessibility of vintage sewing machine manuals in PDF format represents a significant advantage for enthusiasts and restorers. Platforms like Archive.org facilitate easy downloading, creating a readily available digital library. This allows for convenient access on various devices – computers, tablets, and smartphones – enabling reference during repairs or simply studying the machine’s intricacies.
However, the practicality of a physical copy shouldn’t be underestimated. Printing these PDFs provides a tangible resource, free from the reliance on technology and ideal for use in workshops where devices might be susceptible to damage. A printed manual can be annotated, highlighted, and kept close at hand during disassembly and reassembly, offering a direct and reliable guide. Combining both digital and physical formats ensures the long-term preservation and usability of these valuable resources.
Physical Preservation Techniques
Preserving original vintage sewing machine manuals requires careful handling and protective measures. Given their age, paper can become brittle and susceptible to damage. Archival-quality sleeves or folders, made from acid-free materials, are essential for protecting against dust, light, and handling wear. Avoid using adhesive tapes or glues directly on the pages, as these can cause irreversible damage over time.
Storing manuals in a cool, dry environment, away from direct sunlight and fluctuating temperatures, is crucial. Consider digitizing the manual as a backup, safeguarding the information even if the physical copy deteriorates. Gentle cleaning with a soft brush can remove surface dust, but avoid using liquids. Careful preservation ensures these historical documents remain accessible for future generations of sewing machine enthusiasts.
Adapting Manual Knowledge to Modern Use
While vintage sewing machine manuals detail operation for their era, their knowledge remains surprisingly relevant today. Understanding the mechanics described within fosters a deeper appreciation for sewing technology and troubleshooting skills applicable to modern machines. The principles of tension adjustment, stitch formation, and lubrication are universal, regardless of age.
Furthermore, manual-derived repair techniques can extend the life of both vintage and newer machines, promoting sustainability. Benchmarking performance against video resources, alongside manual instructions, provides a comprehensive understanding of expected operation. Adapting this historical knowledge empowers sewists to confidently maintain and utilize their machines, bridging the gap between past and present sewing practices.