Chris Hemsworth’s Workout Plan⁚ A Guide to Training Like Thor
Want to train like Thor? Chris Hemsworth’s workout plan is a comprehensive guide to achieving a god-like physique. This plan emphasizes building strength, power, and endurance with a focus on compound exercises and functional movements. It involves 6 days of intense training targeting different muscle groups, along with a strict diet plan.
Introduction
Chris Hemsworth, renowned for his portrayal of the mighty Thor in the Marvel Cinematic Universe, has become a fitness icon, inspiring countless individuals to strive for a similar physique. His remarkable transformation for each Thor movie highlights the dedication and discipline required to achieve such a god-like stature. Hemsworth’s workout plan, meticulously designed by his personal trainer, Luke Zocchi, is a testament to his commitment to fitness and a blueprint for aspiring athletes and fitness enthusiasts.
This comprehensive guide delves into the intricacies of Chris Hemsworth’s workout plan, providing a detailed breakdown of his daily routines, key exercises, and nutritional strategies. From back-breaking exercises targeting specific muscle groups to full-body circuits designed for explosive power, this plan is a rigorous yet rewarding journey. While achieving Hemsworth’s physique demands immense dedication and hard work, this guide offers a roadmap to unlock your own fitness potential.
This document serves as a valuable resource for individuals seeking to emulate Hemsworth’s training regimen, offering insights into the exercises, sets, and reps that form the foundation of his workout plan. It also explores the importance of consistency, progression, and the role of nutrition in achieving optimal results. By understanding the principles behind Hemsworth’s training approach, readers can create personalized workout plans tailored to their individual goals and abilities.
Chris Hemsworth’s Workout Routine⁚ A Comprehensive Overview
Chris Hemsworth’s workout routine is a testament to his dedication to fitness and a blueprint for aspiring athletes and fitness enthusiasts. It’s a six-day split routine that focuses on building strength, power, and endurance, with a focus on compound exercises and functional movements. This routine is designed to target specific muscle groups while allowing for adequate rest and recovery.
Each day is dedicated to a different muscle group, with a specific focus on maximizing muscle growth and strength. The workout plan typically includes exercises like deadlifts, squats, bench presses, overhead presses, pull-ups, and rows. Hemsworth’s training involves heavy lifting, high-intensity interval training (HIIT), and cardio exercises to ensure a well-rounded approach to fitness.
The routine is designed to be challenging and requires consistent effort and discipline. It’s crucial to listen to your body and adjust the intensity and volume of the workout as needed. The plan also emphasizes proper form and technique to prevent injuries and maximize effectiveness. By adhering to this structured routine, individuals can experience significant gains in strength, muscle mass, and overall fitness.
Day 1⁚ Back
Chris Hemsworth’s back workout is a testament to his dedication to building a powerful and imposing physique. This day focuses on targeting the muscles of the back, including the latissimus dorsi, trapezius, rhomboids, and erector spinae. The exercises are designed to promote muscle growth, strength, and overall back health.
The workout typically includes a mix of compound and isolation exercises. Compound exercises, such as deadlifts and pull-ups, engage multiple muscle groups simultaneously, while isolation exercises, such as rows and lat pulldowns, target specific muscles. Hemsworth’s back workout emphasizes heavy lifting and progressive overload to challenge the muscles and promote hypertrophy.
The workout routine is designed to be challenging and requires proper form and technique. It’s crucial to focus on controlled movements and a full range of motion to maximize muscle activation and minimize the risk of injury. The back workout is an essential part of Hemsworth’s overall training plan, contributing to his impressive physique and strength.
Day 2⁚ Chest
Chris Hemsworth’s chest workout is a cornerstone of his training regimen, designed to build a powerful and defined chest. This day focuses on targeting the pectoralis major and minor muscles, responsible for pushing movements and creating a sculpted chest. The workout typically involves a combination of compound and isolation exercises, utilizing various weights and machines to challenge the muscles from different angles.
Compound exercises like bench presses and push-ups engage multiple muscle groups, including the triceps and shoulders, while isolation exercises like dumbbell flyes and chest press machines target specific areas of the chest. Hemsworth’s chest workout is characterized by a focus on heavy lifting and progressive overload, pushing the muscles to their limits and promoting muscle growth.
Proper form and technique are crucial for achieving optimal results and minimizing the risk of injury. The workout emphasizes controlled movements and a full range of motion, ensuring that the chest muscles are fully engaged and challenged during each exercise. The chest workout is an essential part of Hemsworth’s overall training plan, contributing to his impressive physique and strength.
Day 3⁚ Legs
Chris Hemsworth’s leg workout is a demanding session that targets the quadriceps, hamstrings, glutes, and calves, building strength, power, and a well-defined lower body. This workout emphasizes compound exercises, such as squats, lunges, and deadlifts, which engage multiple muscle groups simultaneously, promoting overall leg strength and hypertrophy.
The workout incorporates a variety of exercises to challenge the legs from different angles and engage different muscle fibers. Squats, for example, target the quads, hamstrings, and glutes, while lunges work the quads and glutes with a focus on balance and stability. Deadlifts engage the entire posterior chain, including the hamstrings, glutes, and lower back.
Hemsworth’s leg workout is designed to push the limits of strength and endurance, requiring a high level of focus and dedication. Proper form and technique are paramount, ensuring that the exercises are performed safely and effectively. This workout is an essential part of Hemsworth’s training regimen, contributing to his incredible strength, power, and overall physique.
Day 4⁚ Shoulders
Chris Hemsworth’s shoulder workout is a comprehensive routine designed to develop well-rounded, strong, and defined shoulders. It targets all three heads of the deltoid muscle – anterior, lateral, and posterior – as well as the surrounding muscles, including the trapezius and rotator cuff. The workout combines a variety of exercises, from traditional weightlifting movements to functional exercises, ensuring that all aspects of shoulder strength and stability are addressed.
The workout often features exercises like overhead presses, lateral raises, front raises, and rear delt flyes. Overhead presses engage all three heads of the deltoid, targeting both strength and muscle growth. Lateral raises isolate the lateral head, building width and definition. Front raises target the anterior head, contributing to a more rounded and balanced shoulder appearance. Rear delt flyes work the posterior head, improving shoulder posture and stability.
Hemsworth’s shoulder workout is a testament to his dedication to achieving a balanced and powerful physique. By focusing on all aspects of shoulder development, he ensures that his shoulders are both strong and aesthetically pleasing. The workout is challenging but rewarding, requiring focus, dedication, and the correct form to maximize results and avoid injury.
Day 5⁚ Arms
Chris Hemsworth’s arm workout is a high-intensity routine designed to build massive biceps, triceps, and forearms. It involves a combination of isolation and compound exercises, targeting each muscle group from multiple angles for maximum growth. The workout often includes exercises like barbell curls, dumbbell curls, hammer curls, triceps extensions, dips, and wrist curls.
Barbell curls are a compound exercise that effectively targets both biceps and forearms. Dumbbell curls allow for greater range of motion and isolation of each arm. Hammer curls engage the brachialis, a muscle that contributes to the overall size and strength of the biceps. Triceps extensions are an essential exercise for building triceps strength and size, contributing to a more defined and powerful arm. Dips are a compound exercise that targets both triceps and chest, building both upper body strength and muscle mass. Wrist curls focus on the forearms, developing grip strength and overall arm aesthetics.
Chris Hemsworth’s arm workout is a testament to his commitment to achieving a sculpted and powerful physique. By combining traditional weightlifting movements with functional exercises, the workout ensures that each muscle group is targeted from multiple angles, promoting both strength and size gains. The workout is demanding and requires focus, proper form, and dedication to achieve optimal results;
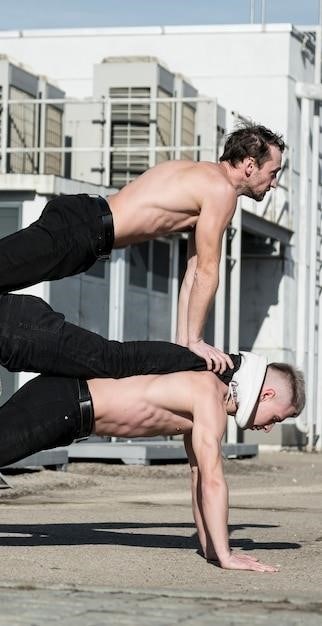
Day 6⁚ Full-Body Circuit
Chris Hemsworth’s full-body circuit is a high-intensity workout designed to challenge all major muscle groups in a single session. It involves a combination of compound exercises, functional movements, and cardio bursts, promoting overall strength, power, and endurance. The workout often incorporates exercises like squats, lunges, push-ups, pull-ups, rows, and core work.
Squats are a compound exercise that targets the quadriceps, hamstrings, glutes, and core. Lunges challenge the legs, glutes, and core, enhancing lower body strength and stability. Push-ups are a bodyweight exercise that targets the chest, shoulders, and triceps. Pull-ups are a challenging exercise that targets the back, biceps, and forearms. Rows work the back muscles, improving posture and overall strength. Core exercises engage the abdominal muscles, promoting stability and a strong core.
Chris Hemsworth’s full-body circuit is a dynamic workout that encourages muscle growth, increases calorie expenditure, and improves overall fitness. It combines the benefits of traditional weightlifting with functional movements, creating a well-rounded workout that caters to both strength and endurance. The circuit is demanding, requiring focus, proper form, and dedication to achieve optimal results.
Chris Hemsworth’s Diet⁚ Fueling the God of Thunder
Chris Hemsworth’s diet is a crucial component of his workout plan, providing the necessary fuel to support his intense training and achieve a god-like physique. It emphasizes a balanced intake of macronutrients, including protein, carbohydrates, and healthy fats, with an emphasis on whole, unprocessed foods. He prioritizes lean protein sources like chicken, fish, and steak, which aid in muscle repair and growth.
Carbohydrates are essential for energy, and Chris Hemsworth’s diet includes complex carbohydrates from sources like sweet potatoes, brown rice, and quinoa. These provide sustained energy throughout his workouts. Healthy fats, like those found in avocados, nuts, and olive oil, are incorporated to support hormone production and overall health.
Chris Hemsworth’s diet is not a one-size-fits-all approach. It is tailored to his individual needs and training demands, and it may vary depending on his role. However, the core principles remain consistent⁚ consuming nutrient-dense foods that support his body’s performance and recovery. It is important to note that Chris Hemsworth’s diet is a high-calorie plan, designed to fuel his intense workouts, and it may not be suitable for everyone.
Key Exercises in Chris Hemsworth’s Workout Plan
Chris Hemsworth’s workout plan incorporates a variety of key exercises designed to target different muscle groups and promote overall strength, power, and endurance. Compound exercises, such as squats, deadlifts, and bench presses, are fundamental to building a solid foundation of strength and muscle mass. These exercises engage multiple muscle groups simultaneously, maximizing efficiency and promoting a balanced physique.
Functional movements, like pull-ups, push-ups, and rows, are incorporated to enhance functional strength and improve everyday movement patterns. These exercises mimic real-life activities, translating directly to improved performance in everyday tasks and athletic endeavors.
The workout plan also includes isolation exercises, such as bicep curls, tricep extensions, and calf raises, to target specific muscle groups for enhanced definition and strength. These exercises help to refine muscle development and achieve a more sculpted physique. Chris Hemsworth’s workout plan emphasizes progressive overload, gradually increasing the weight or resistance over time to challenge the body and promote continual growth.
The Importance of Consistency and Progression
Consistency is paramount in achieving the results you desire from Chris Hemsworth’s workout plan. It’s not about going all out for a few weeks and then abandoning the program. True progress comes from a consistent commitment to the plan, making it a part of your routine. Establish a schedule and stick to it, allowing your body to adapt and grow;

Progression is equally important in achieving substantial results. As your body adapts to the workouts, it’s crucial to challenge it further. This can involve increasing the weight, reps, or sets, or introducing new exercises. By constantly pushing your limits, you ensure that your body continues to adapt and grow stronger.
Remember, the key to success with Chris Hemsworth’s workout plan is to be patient and persistent. It takes time to build muscle and achieve significant results. Stay committed to the plan, gradually progress, and listen to your body. With dedication and consistency, you’ll be well on your way to achieving a physique worthy of the God of Thunder.
Chris Hemsworth’s Workout Plan⁚ A Word of Caution
While Chris Hemsworth’s workout plan is undeniably effective, it’s crucial to approach it with caution. This plan is designed for individuals with a high level of fitness, and it’s important to understand that it’s not suitable for everyone. Before embarking on this journey, it’s essential to consult with a qualified healthcare professional, especially if you have any pre-existing medical conditions.
The plan demands a significant time commitment and requires access to a well-equipped gym. It’s important to ensure that you have the time and resources to dedicate to this demanding routine. Furthermore, the plan is known for its intensity, which can lead to muscle soreness and fatigue. It’s vital to listen to your body and prioritize recovery, allowing ample rest between workouts.
Remember, the most important factor in any fitness program is safety. Prioritize your health and well-being, and adapt the plan to your individual needs and capabilities. Be mindful of your limits, and don’t hesitate to seek professional guidance to ensure a safe and effective workout experience.
Chris Hemsworth’s workout plan is a testament to his dedication and commitment to achieving a remarkable physique. It’s a demanding program designed for those seeking to push their limits and unlock their full potential. While it’s undeniably effective, it’s essential to approach it with caution and prioritize your health and safety. The plan serves as a valuable source of inspiration, highlighting the importance of consistency, hard work, and a balanced approach to fitness.
Whether you’re aiming for a similar level of physical transformation or simply looking to enhance your fitness journey, incorporating elements of Chris Hemsworth’s approach can be beneficial. Remember to tailor the plan to your individual needs and capabilities, consult with a healthcare professional, and prioritize safe and effective training practices. Ultimately, the journey to achieving your fitness goals should be both challenging and rewarding.
By embracing a balanced lifestyle that includes regular exercise, a nutritious diet, and adequate rest, you can make progress towards your fitness aspirations. Chris Hemsworth’s workout plan offers a glimpse into the dedication required to reach peak physical condition, serving as a motivational tool for those seeking to push their limits and embrace a healthier, stronger lifestyle.